Tile Installation Tips
You’ve been hearing a lot about large, thin porcelain tiles (TPT) in recent times. So, here are some tile installation tips:
The lightweight, environmental benefits of these tiles – which start at a thickness (or thinness) of 3 mm – combined with easy installation over existing surfaces with nearly any surface graphic imaginable thanks to digital printing technology make these tiles a game changer in the industry.
There’s one caveat that has some contractors a little gun-shy. There are no published standards for their installation right now, even though the Tile Council of North America (TCNA) is in ardent discussion about the subject.
The National Tile Contractors Association (NTCA), together with the Tile Contractors Association of America (TCAA), International Masonry Institute (IMI) and International Union of Bricklayers and Allied Craftworkers (IUBAC) have come out with a position statement that recommends installing no large thin porcelain tile (TPT) on the floor that is less than 5.5mm thick.
There are considerations in handling and moving the units and recommendations on mortar too. These groups are the founding associations of the Advanced Certifications for Tile Installers (ACT), which is an industry-approved advanced tile installation certification program in the U.S.A.
Contractors experienced with these promising new products shared their wisdom below.
Ensure logistics, employ the proper equipment
Martin Brookes, owner of NTCA Five Star Contractor Heritage Marble & Tile in San Francisco-area Mill Valley, California, U.S.A has been involved with large thin porcelain tile since its introduction about four years ago.
Brookes suggests, “With high-rise interior installation, it is important to make sure the material can actually be transported to the job site via elevators, stairwells etc. easily. Having the right equipment and attending training seminars is essential”.
Substrate preparation is key to success
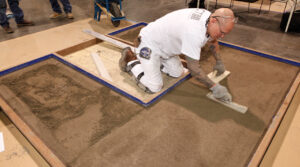
#1 – The substrate must be perfectly flat and level with no deflection. There is no room for error since the tiles themselves cannot be simply pulled off to verify coverage and add or subtract mortar where needed.
#2 – It is critical that the substrate and tile have the mortar keyed into both sides before combing it. The mortar must be of very high quality mixed to a softer consistency which will hold the form of the notch, without being outside of the manufacturer’s recommendations. Depending on climatic conditions, the timing of mortar application is critical. The mortar should not skin over. Some conditions may require up to two installers on a piece of tile and two on the substrate. The key is to be consistent with the final comb angle on both sides.
#3 – Edge levelling spacers are a must
#4 – Proper tooling is a must for receiving, transporting and installing these materials. This requires a substantial investment on the part of the tile contractor.
#5 – The cost for one piece of tile alone can be compounded by a simple mistake. It is highly advised to double-check all measurements, even use templates.
#6- Having a team who works great together and communicates well with each other is extremely important, especially the large tiles.


Thanks for posting this awesome article. I’m a long time reader but I’ve
never been compelled to leave a comment.
I really liked your blog.Really thank you! Will read on…