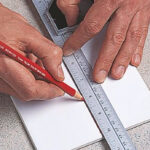
Tips for laying tiles for a flawless look
Hard ceramic and quarry tiles can make an attractive floor covering in your kitchen, bathroom, hallway, or conservatory. They’re hard-wearing and easy to look after, but can be expensive – so take extra care when you’re laying them.
How to lay floor tiles
It’s best to start with the key tile and work your way out towards one of the walls. You can fix the tiles with a standard floor tile adhesive.
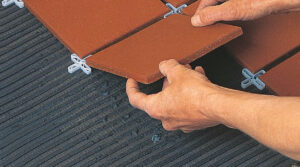
Top tip – Tile spacers
Use tile spacers to create even grout lines between your tiles and achieve a professional-looking finish on the floor. The spacers come in different sizes that are suitable for floor and wall tiles. One can use cross-shaped spacers for standard square or rectangular tiles and special Y-shaped spacers for laying octagonal tiles. Press them well below the surface of the tile so they don’t protrude through the finished grout.
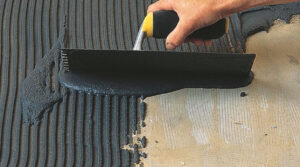
Step 1
Start in the center of the room and pour enough adhesive to cover a square meter of the floor. Spread it evenly using a notched trowel or spreader (the ribbed pattern leaves just the right amount of adhesive to make the tiles stick). Make sure can still see enough of the chalk line to position your key tile. You could nail a guide batten against one line to help measure the first row of tiles.
Step 2
Put the key tile in position, then twist it slightly. This bedsit into the adhesive and makes certain there’s no air trapped. Remember to put plastic spacers between each tile so they’re even. Check the tiles are level by using a spirit level. If you’re laying thick handmade tiles, this might not be possible – in which case you’ll need to rely on your eye and judgment. Continue by working in rows in this quarter of the room.
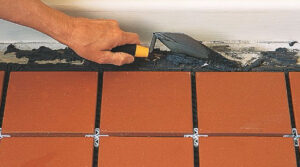
Step 3
When you’ve finished the first section, you’ll need to repeat the process until all but the cut tiles at the edges are laid. Make sure you wipe the tiles with a damp sponge to remove the entire adhesive.

Step 4
Use a trowel to clean out any adhesive left in the gaps around the walls before it sets. Remember that you’ll need to leave the tiles for 24 hours before cutting and laying the edge tiles at the walls.
Nice. Thank you for your post!